This is my first tutorial so kind suggestions are appreciated!!
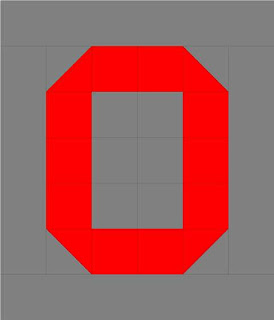
Twenty years or so ago I purchased floor pillows for Christmas gifts from AshCrafts. They were different colors and had names monogramed on them. I decided it was time to recover my pillow and make a Block O Pillow.
First I measured it 27" by 31.5" and then took those measurements to EQ7 to design the pillow. I decided to use 5" squares that would finish at 4.5". With a finished 4.5" border.
Fabric yardage:
3/4 yard of Gray
3/8 yard of Red
1 yard of batting
1 yard of muslin
1 yard of material for the pillow backing, I used fleece
Cutting Instructions:
Start by cutting 4 gray - 5" strips the width of fabric (WOF) these will be used for the borders.
From each strip cut 2 - 5" squares (a total of 8), the remaining strips will be used for the borders.
Then cut 2 red - 5" strips the width of fabric (WOF), cut 12 - 5" squares from the 2 strips.
Half Square Triangles(HST):
Take 2 Gray squares and 2 Red squares and cut them diagonally.
When sewing a project I chain piece as much as possible. This saves time and thread.
After the 4 HST's are done I start sewing the 5" Squares together.
Squares:
Sew 2 Red squares together right sides together. Do this twice for the top and bottom of the "O".
Then I sew the remaining Red squares to the Gray squares right sides together.
You will have 6 sets of Red and Gray.
Clip the pieces apart carefully.
Trim the HST's down to 4.5" using a ruler with a 45 degree diagonal. Place the diagonal line on the sewn seam and carefully trim all 4 edges.
Finished after trimming.
Press the seams of the HST's to the red fabric.
Attach one of the HST's to the Red square set matching the red fabrics.
You will do this twice for the top and bottom of the "O"
Then attach the final HST's to these two 3 piece sets matching the red fabrics.
Now sew 2 of the Red and Gray square sets together matching the gray fabrics.
You will have 3 of these 4 piece sets when you are done.
You should now have 5 sets of fabric.
Placement of these sets is very important.
Set 1 will be sewn to Set 2, Set 3 will be sewn to Set 4 and then Set 5 will be sewn to Set 4.
I didn't have you press the seams on the sets, so that you can alternate the direction of the seams to help ensure the seams interlock.
I place a pin at the left corner, ensuring edges match, then move my way right adding pins as necessary to make sure seams and edges match.
As I feed the Set 1 and Set 2 through the sewing machine I remove pins just before my needle reaches them.
I use my stiletto to ensure that the seam on the bottom continues to lay flat.
Follow the same process for sewing together Set 3 and Set 4.
Then attach Set 5 to Set 4.
Then attach Set 2 to Set 3
You will now have a completed Block "0"
Press the seams so that they lay flat.
Borders:
Measure the vertical center of the Block "O" this measurement should be close to 23" strips.
Take 2 of the 5" Strips and use the vericial center measurement to determine the correct length. Attach both of the borders. Pinning the right side of border to the Block "O" where necessary to ensure the fabrics match. Press seams to border fabric.
After the side borders are added, measure the horizontal center of the Block "O" this measurement should be close to 27.5" strips. Attach both of the borders. Pinning the right side of border to the Block "O" where necessary to ensure the fabrics match. Press seams to border fabric.
Quilting:
Layer the Block "O" the using the batting of your choice and a piece of muslin.
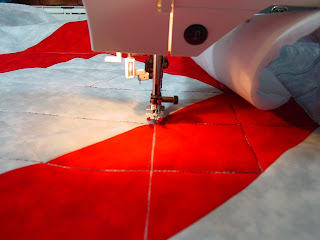
I like using squares because I can quilt using straight lines.
After you finish quilting trim the batting and muslin even with the Block "O".
Finishing:
Take a final measurement to determine the size of the pieces needed for the pillow back.
I measure the length of the pillow, divide that in half and add 4" so that the pillow is not exposed. If the backing material needs a finished edge, just fold under 1/4" twice and topstitch. Place the first piece of backing material right sides together with the Block "O" panel and sew the 3 sides. Lay the second piece of backing material right sides together with the Block "O" panel and overlapping the other piece of backing material and sew the 3 sides. If the backing material needs a finished edge, just fold under 1/4" twice and topstitch.


