Wednesday, July 25, 2012

Desert Sky Quilt top is finished

Last night I was able to sew together the Desert Sky blocks.


I think it turned out really nice!!!

Now I have to decide what my next project should be!!!

 
I think the quilt might be upside down compared to this EQ7 image. 
 

Sunday, July 22, 2012

Desert Sky Steps 6 and 7

I started removing the paper from the blocks earlier this week.  The process went pretty smoothly.  The pattern suggests reducing your stitch size by 1 to allow for easier removal of paper.  The important thing is to not pull so hard that you pull stitches out at the same time!
Yesterday was the first meeting of the Super Saturday Stitches at Cottonpickers Quilt Shop in Chardon, Ohio.  It is a group of quilters that met attending the From Marti and Me Club meetings.  Now we stay on Saturday afternoons for 3 hours to work on our projects.  I packed too many things and Jim was wondering if I was leaving for longer then the day!! 
I had some quilts that needed backings, so I had those in a bag, and backing for my Let It Snow quilt to stitch together.  Then I had 2 of my ArtBin Double Deeps filled with my Snail Tail and my Desert Sky projects.  I love these boxes, they help to keep my project organized.
Beth at Cottonpickers was having a Ping Pong ball sale, so I used my 30% to get backings for 3 of my quilts.  I need to contact Becky at Ruby Blue Quilts to get them on her schedule.

I spent part of the afternoon working on removing the paper from the blocks and then I used 45 minutes to put the blocks on my design wall so the other quilters could help me with my color placement.


I completed removing the paper today and I'm now ready to cut out the final six 7 inch blocks and complete the placement of the border blocks.
As you can see Nermal is helping me!!


Sunday, July 15, 2012

Desert Sky Step 5

I have completed 16 of the blocks for my Desert Sky quilt.  So I have updated by EQ7 version of the quilt.  This will probably not be the final version.

What do you think?

Tuesday, July 10, 2012

Desert Sky Step 3 and 4

After cutting the fat quarters in to the designated pieces, Judy recommends using small binder clips to hold the fabrics together.


You need to separate the foundation pieces.


Judy explains the paper piecing way better then I can.

It works because of her step by step instructions.

And the use of the folding card and 1/4" add on ruler for trimming.


It always amazes me that something this ugly can turn into this!!!


Step 4 is going to take a while, I will post some pictures when I complete the curved piecing of the background piece.

I hope to get a block of time this weekend to work on this, or it's going to take forever!!

Monday, July 9, 2012

How I chose a Long Arm Quilter

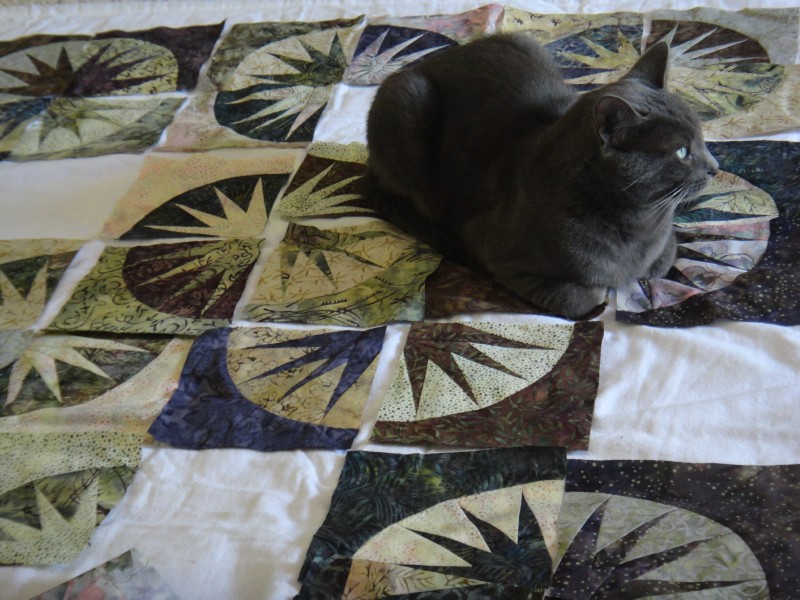
I got back into quilting in 2006 and have been piecing quilt tops like a maniac!! So how do I get all this tops quilted and made into a quilt? Some of the quilts I have quilted myself on my home sewing machine. The majority of the others, I have had quilted by an experienced long arm quilter.
I have been fortunate to use 2 experienced quilters in the last 4 years. I had heard about long arm machines and quilters, but didn’t think I could afford their services. Then I saw a sample quilt in a shop of a kit that I had recently made myself. I decided that I wanted to have my quilt similarly quilted. The shop put me in contact with the quilter and a friendship was started. I had seen her sample so I was comfortable with her skill level and when I talked and then met her, I was even more impressed. In my opinion she is an Artist! She does all of her quilting Free Hand!! Her pricing per inch was acceptable and she was willing to hear what I wanted done, but made suggestions on ways to enhance the quilt.
I recently sent her an oddly shaped wall hanging, that she sent back to me, because she didn’t feel comfortable quilting it. I’m glad she did that, I would rather she not quilt it, then to damage it in the process. Honest discussion of projects is very important between you and the person you pay to complete them. You want to be happy with the completed quilt and your quilter wants you to be able give her a good recommendation.

The second quilter I found through recommendations from my local quilt shop. I had seen examples of her work and had met her a couple times. She had left some coupons at the local quilt show, so I decided to have her quilt a few quilts. She also is a Free Hand artist, and we discussed some ideas for each of the quilts. They turned out great and I would recommend her to anyone that asks.
When deciding to turn your quilt top over to someone to quilt I would suggest you discuss and think about the following items.

Ask if they have pets or smoke.  I would prefer that my quilt not smell of smoke or have excessive pet hair on it when I get it back. 

Recommendations

Get recommendations from fellow quilters and local quilt shops.

Look at the quilts in local shows and see if a quilter has completed a quilt that you really like. Most shows now list who the quilter is.

Skill level/Experience
How long has the quilter been a paid Long Arm quilter, how many quilts have they completed?

Quilting Style

Free Hand, pantograph templates, computerized

Levels of Quilting

There are many levels of quilting, these are my levels:

Utility – Baby quilts, Picnic quilts, Pet quilts, Bed quilts
Home Décor – You want people to look at these quilts and wall hangings and say how beautiful!

Show - You want people to look at these quilts and say WOW!

These quilts usually include dense quilting and maybe even special threads, such as variegated or metallic.

When talking to your quilter they should ask what you plan to use this quilt for, which will help you both to settle on a style and price.
Pattern selection
Your quilter should be willing to listen to what you want, but be able to make suggestions on thread and motif choices to enhance the quilt.

Free Hand quilters should have samples of the patterns/motifs they use.

A pantograph and a computerized quilter will have samples of the patterns/motifs they use also.
Pricing

Ask if there is a minimum charge.
Some quilters have a setup fee and a minimum price per quilt. A minimum charge can be a little high if you have a small wall hanging to be quilted.

Pricing may be based on the square inch or yard. There is usually a thread and batting charge (unless you supply your own batting).

Shipping

As quilters we know fabric is heavier than it looks. So don’t be surprised at the cost of shipping. And make sure you track your package, both ways. You may want to pay to have your package insured.
You have to remember that it will cost more to have the quilt shipped back, if you did not send batting with it in the first place.
 
I hope some of these tips will help you in your search for the professional long arm quilter that will turn your quilt tops into quilts.


Sunday, July 8, 2012

Hot Hot weekend in Central Ohio!!

Just returned from Columbus.  I was glad our motel had power and air conditioning!!!

Jim and his friends drove their classic cars down for the Good-Guys Show on Thursday morning.  I followed on Friday afternoon.  I visited with my quilter and friend Jennifer McCann and then met the guys for dinner. 

It was in the high 90's and over 100 degrees at times this weekend!!  The guys spend Friday and part of Saturday at the Ohio State Fairgounds walking around on the ashphalt.

I visited 4 quilt shops, picked up 4 speakers and had lunch at the Cracker Barrel.  I think I had the better weekend!!

I started off by visiting the The Glass Thimble in Clintonville, Ohio.  Fortunately they were open, because their area had been hard hit by a storm the week before.  I had seen some Daylily fabric on their website and was able to pick that up for a Fractured Flower quilt. 


I also found a great Mariner's Compass book called Reaching for the Stars by Brenda Henning.  It has a number of foundation pieced Mariner's Stars for beginners to advanced quilters.


She also has a companion disc, with some more blocks and the ability to print off the foundation papers on my printer.

I really like the quilt on the cover and this one called Let It Snow.


I will be looking for fabric on sale because this one needs 5 yards for the background!

My next stop was Quilt Beginnings in Dublin, Ohio.  I was able to add a few Gray batiks to my Scarlet and Gray batik stash.

Then it was on to Red Rooster Quilts also in Dublin, Ohio.   Where I picked up a couple Lil Twister patterns, one for this patriotic wall hanging.


I also found a couple Buckeye patterns I couldn't walk away from.  These are small wall hangings that I think I will make to hang in my cube.


I volunteered to pickup some speakers for my husband so I traveled down to London, Ohio and stopped at the Cracker Barrel on my way back for lunch.  Then back to Dublin for another set of speakers.  From there I went to Quilt Trends in Columbus, Ohio.  I found a couple Red Batiks which are hard to find and a Black batik I already had.  Then it was back to the motel room to cool off!!!

I can't wait to start laying out the Mariner's Compas quilt in EQ7.  One more of many projects to I want to complete some day!!!


Desert Sky Step 1 and 2

The fabric has been selected.  It is 24 different Batiks Fat Quaters with unknown names and different manufacturers.  They range from Dark to Light.


Now it's time to cut out the first pieces.  I had to number nine of the darks 1 - 9 and match them with nine of the lights.  Then I divided the pile in half and followed the layout in the pattern. 

What's cool about Judy and Bradley's pattern is that they have you cut out pieces to use for the foundation piecing.  I was always concerned about not having big enough pieces.


This is a pictue of the first pile.  I have to complete the cutting of this pile and start on the remaining one.  Nine pieces of fabric can be cut with a sharp rotary cutter.

So now 18 of the 24 fabrics have been used.  The remaining 6 will be used for border blocks and solid blocks.


I will return with photos of the foundation piecing!!

Monday, July 2, 2012

Desert Sky - my first Judy Niemeyer quilt


I have selected 24 Batks and they have been cut into fat quarters.

They need a final pressing before I start cutting them into pieces!!

I also scanned all the fabrics so I can use EQ7 for help with placement of the fabrics.

I will post pictures as I go along so you can see my progess.